As a professional contractor with over 15 years of experience in interior finishing, I’ve developed this board and batten calculator to help DIY enthusiasts and fellow professionals accurately plan their projects. This tool accounts for all the variables that can impact your material needs and costs.
How to Use This Board and Batten Calculator
- Start by entering your wall dimensions in the “Dimensions” section
- Add details about doors and windows to subtract these areas from your calculations
- Specify your board width and desired spacing between boards
- Review the automatically calculated material requirements in the “Layout” and “Material” sections
Why This Calculator Is More Accurate
Unlike simpler calculators, this tool accounts for:
- Multiple unit conversions (metric and imperial)
- Door and window openings that reduce material needs
- Proper spacing calculations between boards
- Complete material breakdown including boards, battens, furring strips, and trim
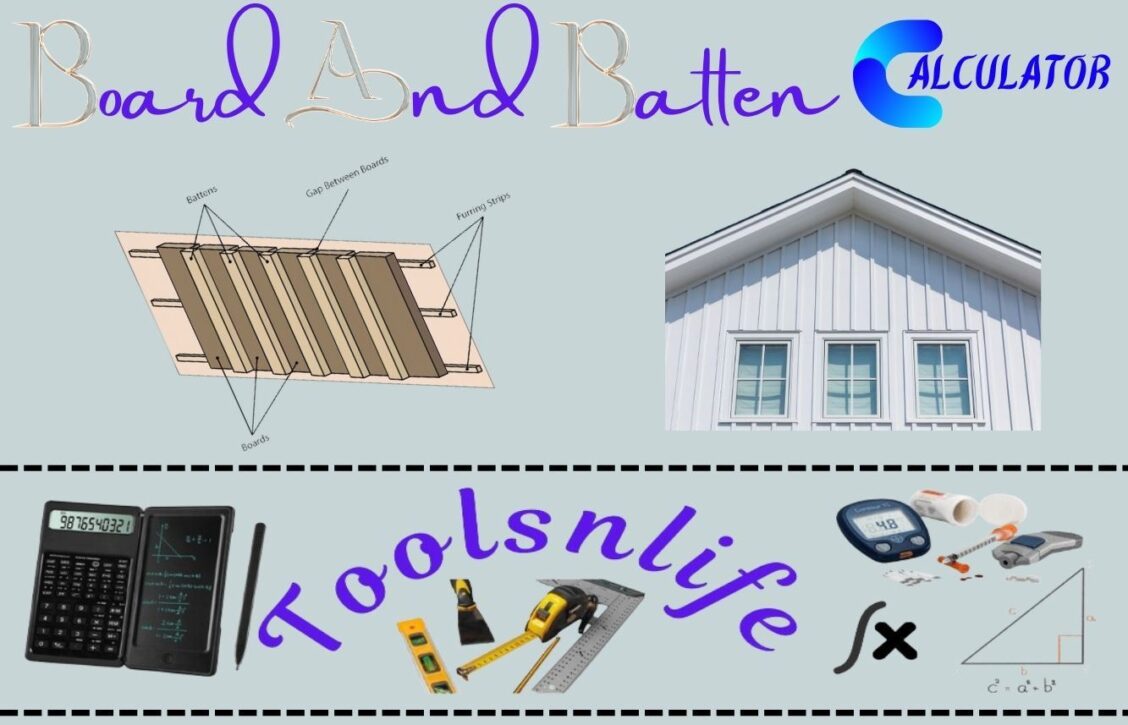
Board and Batten Wall Shape
Board and Batten Gable Shape
Pro Tips for Board and Batten Installation
- Always add 10-15% extra material for cuts and mistakes
- Use a level for every board placement – don’t trust your eyes alone
- Prime all wood materials before installation for better paint adhesion
- Consider using PVC boards in high-moisture areas like bathrooms
- For exterior applications, use pressure-treated wood or cedar
Common Board and Batten Patterns
The traditional board and batten pattern features wide boards with narrower battens covering the seams. However, modern variations include:
- Traditional: 10-12 inch boards with 2-3 inch battens
- Modern Farmhouse: 6-8 inch boards with 1-2 inch battens
- Vertical Shiplap: 6 inch boards installed tightly without battens
- Grid Pattern: Horizontal and vertical battens creating a grid effect
Material Selection Guide
Choosing the right materials is crucial for a successful board and batten installation. Here’s my professional recommendation based on project type:
| Material Type | Best Use | Pros | Cons |
|---|---|---|---|
| Pine | Interior walls | Easy to work with, takes paint well | Can warp if not properly acclimated |
| MDF | Painted interior applications | Smooth surface, consistent dimensions | Not moisture resistant |
| PVC | Bathrooms, kitchens, exteriors | Completely waterproof, no rotting | More expensive, limited paint options |
| Cedar | Exterior applications | Natural weather resistance, beautiful grain | Premium price point |
Cost Estimation Factors
While this calculator provides material quantities, your total project cost will depend on several factors:
- Material quality: Premium woods cost significantly more than basic pine
- Labor: Professional installation adds $3-8 per square foot
- Paint and primer: Quality products ensure longevity
- Tools: Nail gun, level, saw – either purchase or rental costs
- Wall preparation: Repairing existing walls adds to project time and cost
Frequently Asked Questions
Q: What’s the ideal spacing between boards?
A: For traditional board and batten, 12-24 inches between boards works well. Our calculator helps you visualize different spacing options.
Q: Can I install board and batten over drywall?
A: Absolutely! Use furring strips to create a flat surface, then attach your boards directly to them.
Q: How do I handle inside and outside corners?
A: For inside corners, butt boards together. For outside corners, miter cuts create a professional finish.
Tools You’ll Need for Installation
- Measuring tape and pencil
- Level (4-foot and 2-foot)
- Miter saw or circular saw
- Nail gun with 2-inch finish nails
- Caulk gun and paintable caulk
- Wood filler and putty knife
- Sandpaper (120-grit and 220-grit)
- Paint brushes and rollers
- Safety glasses and hearing protection
Troubleshooting Common Issues
Even with careful planning, issues can arise during installation. Here’s how to handle common problems:
- Uneven walls: Use furring strips to create a flat surface before installation
- Gaps between boards and wall: Apply paintable caulk before painting
- Board warping: Acclimate wood to room conditions for 48 hours before installation
- Nail holes showing: Use wood filler, sand smooth, then touch up with paint
Start Your Board and Batten Project With Confidence
Now that you have access to this comprehensive board and batten calculator and guide, you’re equipped to tackle your project with professional-level planning. Whether you’re creating an accent wall, updating your home’s exterior, or adding character to a room, proper material calculation is the foundation of a successful installation.
Ready to begin? Use our calculator above to determine your exact material needs, then head to your local home improvement store with confidence. Don’t forget to save or print your results for reference while shopping. If you found this tool helpful, please share it with fellow DIYers or leave a comment about your project!